Garden catalogues are a far cry from reality. All they show is pictures of glorious months when the weather is nice and shiny and the flowers bloom with all its might. But as you do a reality check, winters are not the friendliest of seasons when it comes to gardening. While summer will arrive when it does, you can at least get started on a summer flower or the veggies garden by planting the seeds. You can save a lot of money by buying seeds in winters as it costs much cheaper. But they will deliver the same results and the same blooming produce that will fill your gardens with its bright colours, long before the summers arrive.
To grow plants at the cusp of departing winters and approaching summers is that by the time the friendly season is here, the entire basic job is done and the upcoming sun will only enhance the growth of these plants. Just be cautious about the temperatures of the soil that these plants are able to withstand before you go on a planting spree. Planting them too early will make them sprout even before the garden is ready to receive them.
Seeds that are germinating
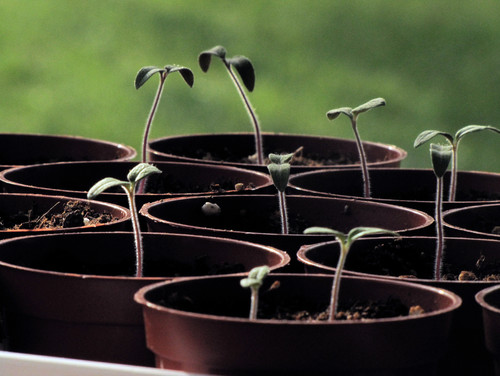
[Image: Sheila J. Schmitz]
Seeds are very flexible with where they are planted. All you need is a container deep enough for good drainage to work. Some people are also seen sowing seeds in flat trays or bowls and some do it in large pots. The choice is really yours where you want your seeds to grow.
If you are looking at containers that have been lying around the house, make sure that they are scrubbed thoroughly and soaked in a bleach solution for at least 30 minutes. Just dry them for before you use it to plant the seeds.
Soil
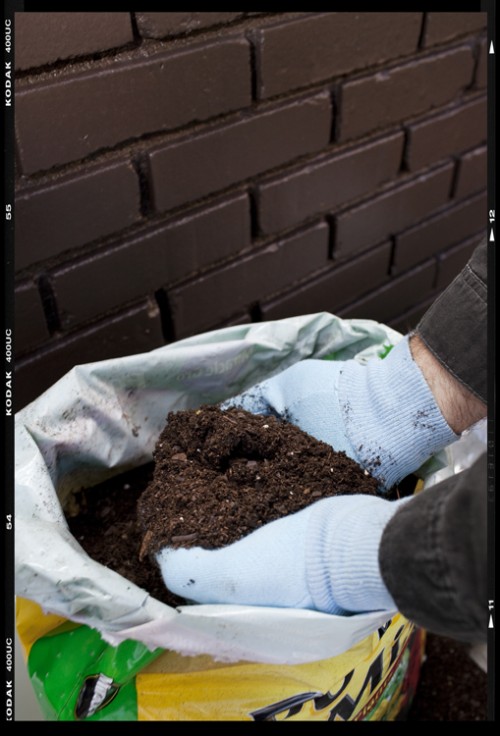
[Image: decordemon]
To get best results for your seeds, use potting mix or seed starting. You must moisten the mix properly and allow it to drain. The mix should be damp but should not have any clumps or should not be heavy or too wet. It depends on you when you want to do this; it can before or after you add them to the containers.
To be on the safe side, it is always better to check the seed packet for any additional requirements before you begin planting. It will also be specific about any particular prerequisite of soil or light.
Planting the seed
[Image: Sheila J. Schmitz]
Plant at least 2 seeds in each pot or you can also use a seed tray and distribute the seed mix on it. Use the seed packet to understand the depth needed for the seeds to become a sapling and cover it with the right amount of mix. Lightly stuff it in place and cover it with additional mix if needed. Just add enough water for the soil to be moist but don’t overwater it.
You can also add cute labels of the planting date and plant name on the pots. These labels are easily available in nurseries and even home stores in the gardening section. The DIY idea would be to use popsicles. Write using the permanent ink so that the ink doesn’t run or fade when it comes in contact with water.
To speed up the germination process, you can cover the plants with a plastic wrap so that the soil remains warm and moist. The temperature should always be over 24 degrees Celsius for plants that need more warmth to breed. You can maintain this temperature by setting them on a heating mat or a refrigerator. However, do ensure that the surface is not too hot and does not exceed 32 degree Celsius. Winter friendly plants will do well at room temperature and do not need external heat.
The best way to keep the soil moist and prevent getting it overly wet is by using a tray under the seedling containers.
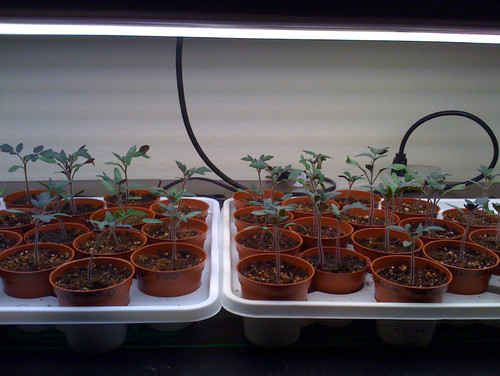
Seed care
Once the seedlings start to appear, you can remove the plastic cover and relocate the plants to a brighter location of the house where the daytime temperature is between 16 and 24 degrees. This can be any section from a warm window to a greenhouse and even a porch that gets ample amount of sun.
If you don’t have a spot in your house that is bright enough then you can create one with a grow-light setup. You can use a heating mat underneath, but it is not necessary. Position the light 3 inches above the plant and keep raising it as the plant grows.
For the plants to grow to its full potential, they would require at least 12-16 hours of light each day. Inadequate light will make the plants weak. After the leaves make an appearance, feed the plant with diluted organic fertilizer for its better growth.
Making the transition to larger pots
Depending upon the growth of your plants and the size of the original container, they may need a new home soon. They can be shifted to a 4 inch pot, which is the standard size for seedlings that have grown out of their seed trays.
Don’t rush the transition as the first sign of leaves on your seedlings are not really leaves. They are called cotyledons that are the first food for the seedlings. Wait until there are true leaves and are different in appearance than the cotyledons.
The second set that grows is the true leaves, and this is the indicator for you to transfer the plants now. Just add potting mix to the moistened container and make a hole in the soil to add the plant. Now with gentle hands, turn the container upside down and remove the plant from the soil. The right technique is to hold the plant by the leaves and the root ball and not by the stem. Do this work with patience as you do not want to damage the plants in the process of transition.
Some gardeners suggest that swaying your hands gently above the plant replicates the wind and naturally makes the stem grow stronger.
Acclimatization
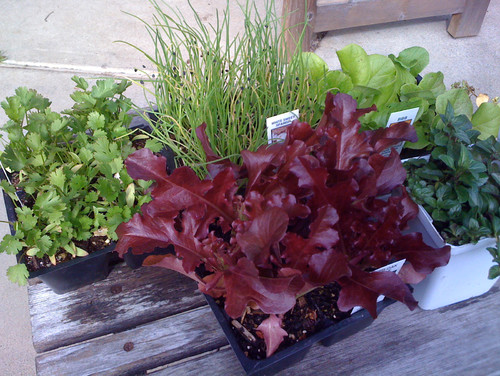
[Image: Sheila J. Schmitz]
Starting at least a fortnight before you want to actually introduce your plants to the outdoor, you need to do the acclimatization or hardening off. This is when you gradually make the plants accustomed to their new habitat. This is the time when you should stop the fertilizing and also reduce the watering of the plants by a degree.
Just keep the plants outside for a couple of hours every day and slowly increase the time they stay outside. If it is too cold outside, then you can bring the plants back inside.
You not only have to control the time these plants stay outside, but also the exposure to wind and sun at first. Carefully place the pot in a place where there are minimal sun and wind, then gradually take them to brighter spots and until they are ready to withstand direct sunlight.
Once the plants have been properly inducted into their new habitat, they are ready to move into their next home – permanent containers in the garden.
For the safety of these plants, cover the seedlings with bird nets. New plants are very attractive and tasty for the birds and critters.
Alternative solution
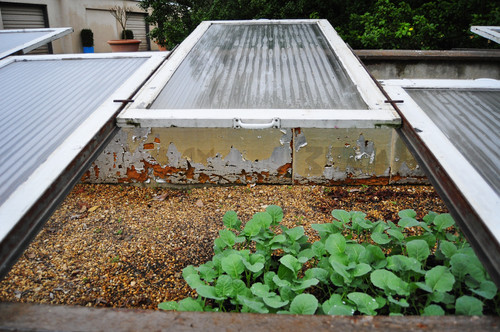
[Image: Amy Renea]
Although, there is always an option to start the process inside your home yet if you absolutely must do this outside your house, then you can also consider cold frames, greenhouse, and cloches.
When you use a cold frame, hardening off the plants requires that you remove the top cover each day little by little and close it shut at night. Gradually, increase the time the seedlings remain in the open.

[Image: HIBBIT]
You can also place a cloche on the plant at night, which keeps it warm. However, it is only doable with few plants and not a whole garden.
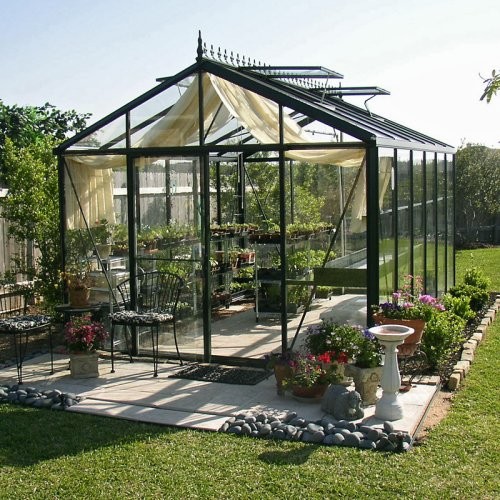
[Image: Hayneedle ]
The best thing to have will be a greenhouse. It is ideal for your plants to grow in all seasons. When the greenhouse is suitably warm, it can be used to grow the seedlings too. If this is not, you can use the greenhouse as a short step between garden and home.
Not many people knew that the prep work for the summer garden can begin long before the season truly arrives. With these steps, you can prepare a healthy looking garden that will be in its full bloom by the time people start planning their gardens for the season. It is really just about ‘planting the seed’.